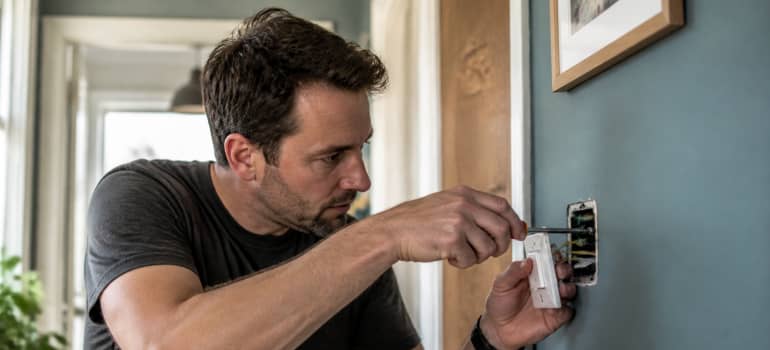
That light switch has been on the list for months. Maybe it’s cracked, yellowed, or just completely wrong for the room you’ve just repainted. Whatever the reason, you’ve finally decided to do something about it. The good news is that replacing a light switch is one of those jobs most competent DIYers can handle confidently. There are a few things worth knowing before you pick up a screwdriver, though.
This guide covers everything from safety to style. We’ll walk you through the actual process, explain the rules that apply in the UK, and help you pick a switch that looks like it belongs in your home.
TL;DR
Replacing a light switch is a legal DIY task for most ordinary rooms in the UK. Turn off the power at the consumer unit, photograph the wiring before you touch it, connect the new switch to the matching terminals, and restore the power to test. In bathrooms or anywhere near water, the job needs a registered electrician under Part P.
Table of Contents
Can You Replace a Light Switch Yourself?
In most cases, yes. A like-for-like light switch replacement is legal and straightforward for a competent DIYer in England and Wales. You don’t need to notify building control, you don’t need to hire a certified electrician, and you don’t need any special qualifications, as long as you’re working in an ordinary room and replacing an existing switch with a comparable one.
That changes in certain areas of your home. Bathrooms and shower rooms fall under Part P of the Building Regulations, which restricts what you can do yourself near water. In these zones, electrical work typically needs to be carried out or inspected by a registered electrician. Kitchens are a grey area. Most standard switch replacements are fine, but anything involving new circuits or significant changes will need to be notified to building control. If in doubt, check with your local authority or consult a registered electrician.
Be honest with yourself, too. If the existing wiring looks unusual, the colours don’t make sense, or the back box is in poor condition, don’t push on regardless. Those are signs the job needs more expertise than a basic swap-out requires.
What Tools Do You Need to Replace a Light Switch?
Safety here isn’t about being overly cautious. It’s about doing the job properly the first time. The risks with light switch replacement are real but entirely manageable if you follow a sensible sequence.
Before you touch anything, you’ll need a few basic tools:
- A flathead screwdriver
- A crosshead screwdriver
- A non-contact voltage tester (also called a live wire detector)
- A smartphone or camera for photographing the existing wiring
- Electrical insulating tape
- A small torch if the back box is awkward to see into
The voltage tester is non-negotiable. It costs very little and tells you clearly whether a wire is live. Don’t rely solely on switching the light off at the wall. Always isolate the circuit at the consumer unit and confirm the circuit is dead with the tester before you touch any wiring.
One tip that gets overlooked: take a clear photo of the existing wiring before you disconnect anything. It sounds obvious, but in the moment of removing screws and pulling wires free, it’s easy to lose track of what went where. A photo removes all guesswork when connecting the new switch.
How to Replace a Light Switch: Step-by-Step
A safe, step-by-step process for replacing a standard light switch in a UK home.
Turn off the power at the consumer unit
Locate the correct MCB (miniature circuit breaker) for the lighting circuit you’re working on and switch it off. If your consumer unit allows it, lock the MCB in the off position to prevent anyone accidentally restoring the power while you work. Never rely on switching the light off at the wall. That only breaks one part of the circuit.
Confirm the circuit is dead
Use your non-contact voltage tester on the light switch before touching any wiring. Hold it near the switch and near the cables. If it beeps or lights up, the circuit is still live and you need to find the correct breaker before continuing. Only proceed once the tester confirms no live voltage is present.
Remove the old switch and photograph the wiring
Unscrew the faceplate carefully and ease it away from the back box. It’s often held in by the tension of the wires, so don’t yank it. Take a clear, well-lit photo of all the wires and which terminal they connect to before you loosen anything. This photo is your insurance policy if you lose track of the connections.
Disconnect the old switch and connect the new one
Loosen the terminal screws and remove each wire one at a time, referring to your photo as you go. Connect each wire to the corresponding terminal on the new switch. Terminals are usually labelled: L1 and L2 for one-way, and COM, L1, L2 for two-way. If wires are old and have no colour sleeving, add brown sleeving to identify live conductors. Ensure each connection is firm. A loose terminal is a fire risk.
Secure the switch and test
Fold the wires neatly into the back box and screw the new faceplate into place. Don’t overtighten. It can crack the faceplate. Once the switch is secured, go back to the consumer unit and restore the power. Test the switch normally. If it works as expected, the job is done. If not, switch the power off again and recheck your connections against your photo.
Check also:
Choosing the Right Light Switch for Your Home
This is where most guides go quiet, and they really shouldn’t. The switch you choose has a surprisingly big impact on how a room feels. A brushed brass rocker on a Victorian terrace looks intentional. The same switch in a sleek modern flat can look completely out of place. The reverse is equally true.
Here’s a quick breakdown of common switch finishes and where they tend to work well:
| Finish | Best suited to | Worth noting | |
|---|---|---|---|
| White plastic | Rental properties, utility rooms, neutral interiors | Affordable, widely available, easy to replace | |
| Brushed brass | Period homes, warm-toned rooms, traditional kitchens | Requires earthing if metal faceplate | |
| Chrome / nickel | Contemporary bathrooms (pull cord only), modern interiors | Shows fingerprints more readily than other finishes | |
| Matt black | Industrial-style rooms, dark-painted walls, design-led spaces | Popular recently. Think carefully before committing |
Beyond material, think about the profile. Slim, flat switches suit minimalist rooms. Deeper, more traditional rocker-style switches suit rooms with period detail. Neither is objectively better. They just suit different spaces. It’s worth holding a couple of options against the wall before you commit.
Check also:
Handyman vs Electrician: Who Should Handle Your Electrical Tasks?
Understanding Different Light Switch Types
Not all light switches work the same way, and getting this wrong means buying the wrong replacement. Here’s what you need to know before you shop.
One-Way vs Two-Way Switches
A one-way switch controls a light from a single point. A two-way switch is part of a pair. Think of a hallway where you can turn the light on at the bottom of the stairs and off at the top. Two-way switches have three terminals rather than two, and the wiring is slightly different. If you’re replacing a two-way switch, you must replace it with another two-way switch, even if only one of the two is being swapped out.
Multi-Gang Switches
A multi-gang switch is a single faceplate with two, three, or more individual switch rockers on it, each controlling a separate light. Replacing one is the same process as a single switch but with more wires. Keep your photo of the wiring especially clear here, noting which wire connects to which gang. Mixing them up is easy, and getting it wrong just means one switch controls the wrong light. Annoying, but fixable.
Dimmer Switches
Dimmer switches have specific compatibility requirements. Not every dimmer works with every bulb. LED bulbs in particular can flicker, buzz, or simply not dim properly if the dimmer isn’t rated for them. Always check the packaging for compatibility with the type of bulb you’re using. If you’re fitting a dimmer to replace a standard switch, be aware that most dimmers also require a minimum load. A single low-wattage LED bulb may fall below that threshold and cause problems.
Does Replacing a Light Switch Need to Comply with UK Regulations?
For most standard light switch replacements in ordinary rooms, you won’t need to notify anyone or get anything signed off. Part P of the Building Regulations covers electrical work in dwellings, but a straightforward like-for-like switch replacement in a living room, bedroom, or hallway sits comfortably within what homeowners can do themselves without notifying building control.
The rules change in certain areas. Work in bathrooms, shower rooms, or any location within a defined zone near water is notifiable under Part P. That means it either needs to be carried out by a registered electrician who can self-certify the work, or it needs to be notified to your local building control authority before the work begins. Failure to do this can cause problems when you come to sell your home. Buyers’ solicitors often ask for electrical compliance documentation, and gaps in paperwork can delay or complicate a sale.
All electrical work in the UK should comply with BS 7671, the national standard for electrical installations (also known as the IET Wiring Regulations). For a DIY switch replacement, this mostly means ensuring connections are secure, earth conductors are properly connected, and the work is safe to use. A professional electrical service handles wiring, installations, and any electrical work that falls outside what’s safe to DIY, including periodic inspection reports if your installation needs checking.
One thing worth mentioning: if you’re in rented accommodation, check your tenancy agreement before carrying out any electrical work. Many landlords require prior approval, and some require all electrical work to be done by a qualified electrician regardless of the type.
Get your electrics sorted today
Enter your postcode to view our rates and availability in your area.
For questions about the services we offer visit our main site
Frequently Asked Questions
Can a metal faceplate be used if the old switch was plastic?
Yes, you can swap a plastic switch for a metal one, but you must earth the metal faceplate. Metal faceplates have an earth terminal on the back, and it needs to be connected to the earth conductor in the back box. If there’s no earth wire in the back box, do not fit a metal faceplate. An unearthed metal faceplate is a genuine safety risk.
What should I do if the wiring colours don’t match the new switch?
Older UK wiring used red and black instead of the current brown and blue colour code. If you encounter this, refer to your photo of the existing setup and match the positions rather than the colours. Add brown sleeving to any red wires to identify them as live conductors. If the wiring is confusing, unclear, or inconsistent, stop and consult a registered electrician rather than guessing.
How can I make sure a dimmer switch is compatible with my bulbs?
Check the dimmer’s packaging carefully. Manufacturers list compatible bulb types and wattage ranges. LED bulbs generally require a trailing-edge dimmer. Fitting the wrong type can cause flickering, buzzing, or early bulb failure. If you’re replacing a standard switch with a dimmer, also check the minimum load requirement and confirm your bulbs meet it.
Do I need an earth wire for a standard plastic light switch?
Standard single-gang plastic switches don’t have an earth terminal and don’t require an earth connection to the switch itself. However, if there’s a bare earth wire in the back box, it should be sleeved in green and yellow and connected to the earth terminal of the back box, not left loose. Earth connections matter. Don’t cut corners here.
Takeaways
- Most like-for-like light switch replacements in ordinary rooms are legal DIY jobs in the UK, with no need to notify building control.
- Always isolate the circuit at the consumer unit and confirm it’s dead with a voltage tester before touching any wiring.
- Photograph the existing wiring before disconnecting anything. It removes all guesswork when wiring the new switch.
- Metal faceplates must be earthed. Fitting one without an earth connection is a genuine safety hazard.
- Bathrooms and other notifiable locations require a registered electrician or prior approval from building control under Part P.






Leave a Reply