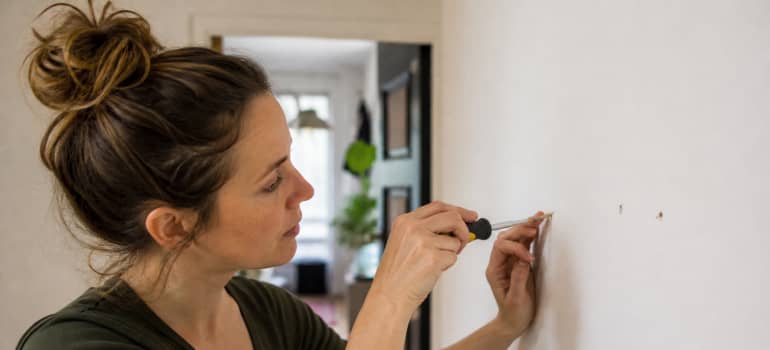
You’re standing in the middle of a room that’s halfway through a makeover, drill in hand, staring at a stubborn little plastic plug sitting flush in your freshly plastered wall. It looked so simple from the outside. Just pull it out, right? Except it won’t budge, and now you’re wondering if yanking harder is going to take a chunk of wall with it. Sound familiar? Knowing how to remove wall plugs properly is one of those skills most people only discover they need when they’re already mid-project.
The good news is that removing wall plugs doesn’t have to be a destructive process. The bad news is that the wrong technique for the wrong plug type can leave you with holes that are much messier than the original. There’s a real difference between a clean job and one that needs patching back to bare plaster. This guide covers all the main plug types, the right tools, the common slip-ups, and what to do once the plug is out.
TL;DR
- Different wall plug types need different removal methods, there’s no single universal technique.
- Plastic plugs are the easiest to remove and usually come out with pliers or a screwdriver.
- Metal anchors and toggle bolts need more patience and occasionally a specialist extractor tool.
- Always check the wall condition and plug type before you start, rushing causes the most damage.
- After removal, fill, sand, and prime the holes properly before redecorating for a clean finish.
- Using the wrong tool is the most common mistake and the leading cause of unnecessary wall damage.
Table of Contents
How to Remove Wall Plugs Without Damaging the Wall
Removing wall plugs without damaging the wall comes down to matching the right method to the right plug type. Use gentle, controlled force wherever possible, and accept early on that some plugs need strategy rather than strength. Here’s how to tackle each type.
Removing Plastic Wall Plugs
- Remove the screw first. If there’s still a screw in the plug, unscrew it completely. Don’t try to pull the plug out with the screw still in place, the screw is what’s holding the plug expanded.
- Try the screwdriver lever method. Insert a flathead screwdriver into the plug hole and gently lever the plug outward. If the plug is flush with the wall, this gives you enough lip to work with.
- Use pliers for grip. If any part of the plug protrudes from the wall, grip it firmly with needle-nose pliers and pull straight out with steady, even pressure. Don’t wiggle side to side, you’ll enlarge the hole in a way that’s much harder to fill cleanly.
- The screw-and-pull trick. Re-insert a screw about halfway into the plug, don’t drive it all the way in, just enough to catch the plug material. Then grip the screw head with pliers and pull the whole assembly out together. This works surprisingly well on plugs sitting just below the surface.
- For stubborn plugs in hard walls. If the plug is in dense brick or concrete and genuinely won’t shift, it’s sometimes cleaner to push it further into the wall, fill the hole, and move on rather than fight it.
Removing Metal Wall Anchors
- Identify the anchor type before touching it. A molly bolt behaves very differently from a spring toggle. Look carefully at what’s in the wall before you start.
- For molly bolts. Re-insert the bolt and tighten it until you feel resistance, then continue turning. This collapses the metal wings back slightly and can loosen the anchor enough to pull it out with pliers. It doesn’t always work, but it’s worth trying before you drill.
- For spring toggles. Once the bolt is removed, the toggle falls behind the wall, that’s how they’re designed. The remaining collar at the surface can usually be pushed into the cavity or pulled out if it’s loose enough. You’ll need to patch the hole either way.
- Use a purpose-made extractor tool. Wall plug extractor sets grip the anchor collar and apply concentrated pulling force without damaging the surrounding plaster. If you’re removing several metal anchors, it’s worth picking one up.
- Drill out as a last resort. Use a drill bit slightly larger than the anchor collar and drill carefully around the fixing until it loosens. This is controlled destruction, you’re deliberately removing wall material to free the anchor. Fill and repair afterwards.
Removing Plasterboard-Specific Anchors
- Accept that some simply can’t come back through the front. If an anchor has expanded behind the board, you’re not getting it out through the face. The choice is push it into the cavity or cut it out.
- Push-through method. For nylon cavity plugs, insert a screwdriver and push the whole plug through into the void behind the plasterboard. It drops into the cavity. Then fill the hole. Simple, effective, far less damaging than wrestling with it.
- For snap-off fixings. These are designed to snap flush with the wall surface. If there’s a protrusion, snap it off level, then fill. If it’s already flush, fill directly.
Check also:
What Tools Do You Actually Need to Remove Wall Plugs?
You don’t need a lot of specialist equipment to remove most wall plugs. But having the right tool for the specific job makes the difference between a clean result and a crumbling hole in your wall.
| Tool | Best For | Limitation |
|---|---|---|
| Needle-nose pliers | Gripping and pulling plastic plugs | Needs something to grip, no use if plug is completely flush |
| Flathead screwdriver | Levering flush plugs, pushing cavity anchors through | Can damage surrounding plaster if used too aggressively |
| Drill with appropriate bit | Drilling out stubborn metal anchors | Last resort only, enlarges the hole |
| Wall plug extractor set | Metal anchors and hard-to-grip fixings | Costs more than basic tools, but saves walls |
| Hammer | Tapping plugs deeper for push-through | Not suitable where there’s no cavity behind the surface |
Needle-nose pliers are the workhorse here. They’re narrow enough to reach into tight spaces and give you controlled grip without clamping onto the surrounding plaster. Regular pliers can work but tend to be too wide and end up gripping the wall edge instead of the plug.
Wall plug extractor tools deserve a mention because most people don’t know they exist. They work a bit like a corkscrew in principle, they bite into the plug material or anchor collar and transfer pulling force directly to the fixing rather than to the wall around it. If you’re doing a full room redecoration and pulling out dozens of plugs, this tool will save you a lot of wall filler.
A professional odd jobs fitting and installation service takes care of all those small tasks around the house that pile up over time, from removals and repairs to installations and finishing work.
What Are the Most Common Mistakes When Removing Wall Plugs?
Most wall damage from plug removal doesn’t happen because the job is inherently difficult. It happens because someone got impatient or used the wrong approach. Here are the mistakes that come up again and again.
Pulling Without a Proper Grip
Trying to pull a flush wall plug with your fingers or a tool that can’t grip it properly usually ends with the tool slipping and gouging the surrounding plaster. If you can’t get a solid, controlled grip on the plug itself, use the screw-and-pull trick instead. Get the screw into the plug first, then pull the screw. You’ll have far better mechanical advantage and much more control.
Wiggling Instead of Pulling Straight
Rotating or rocking a plug sideways while pulling enlarges the hole in an irregular, messy way that’s much harder to fill cleanly. Always pull straight out along the axis of the plug. Keep the pressure steady and even. If it won’t come with a straight pull, stop and reassess, don’t start working it back and forth.
Using the Wrong Size Drill Bit
If you’re drilling out a metal anchor as a last resort, using a bit that’s too large makes an unnecessarily big mess. You want the smallest bit that will free the anchor, typically just slightly larger than the anchor collar’s outer diameter. Go slowly and check as you go rather than driving straight through.
Not Checking What’s Behind the Wall
This matters most when you’re considering the push-through method. In a plasterboard stud wall, pushing a plug into the cavity is fine, there’s a void behind it. In a solid masonry wall, there’s nowhere for the plug to go. You’ll just bury it, which might be acceptable if you’re filling the hole anyway, but it’s worth knowing what you’re working with before you commit to that approach. A quick tap on the wall surface will usually tell you, hollow sounds mean a cavity, a dull thud means solid.
Skipping the Repair
Even a small hole left unfilled can cause problems over time. Bare plaster around an open hole is more vulnerable to moisture, and the edges of the hole will keep crumbling slightly every time anything brushes against it. Fill every hole after extraction, it takes five minutes and the wall will look like nothing was ever there.
Check also:
How to Repair the Wall After Removing Wall Plugs
Getting the plug out is only half the job. What you do next determines whether the wall looks untouched or like something tried to escape through it. Here’s how to do it properly.
How to repair a wall after removing wall plugs, from filling the hole to preparing the surface for redecorating.
-
Clean out the hole
Before you fill anything, remove any loose debris from inside the hole. A small brush, an old toothbrush, or even a quick blast from a can of compressed air works well. Dust and loose plaster inside the hole will stop the filler bonding properly, so don’t skip this step.
-
Choose the right filler
For small plug holes, a standard ready-mixed wall filler is fine. For larger holes left by metal anchors, use a slightly stiffer filler that won’t slump or crack as it dries. If the hole goes deep, fill it in two stages rather than in one go, deep fills shrink more as they dry.
-
Apply the filler
Use a filling knife or putty knife to press filler firmly into the hole, working it in from different angles to make sure the whole void is filled. Leave it slightly proud of the wall surface, just a millimetre or two. Filler shrinks as it dries, so this compensates for that.
-
Let it dry fully
Don’t rush this. Drying time depends on filler type, depth of the fill, and room temperature, but always wait until the filler has changed colour fully and feels hard to the touch before sanding. Sanding wet or semi-dry filler just pulls it out again.
-
Sand flush and smooth
Use fine-grit sandpaper, around 120 grit is ideal, to sand the dried filler flush with the wall surface. Work in circular motions and check regularly by raking light across the surface at an angle, which shows up any high spots or dips clearly.
-
Prime before painting
Bare filler is porous and will show through paint as a dull patch, even after multiple coats of emulsion. Apply a coat of primer or diluted emulsion over the filled area first, let it dry, then apply your topcoat. This is the step most people miss, and it’s why their repairs still show.
-
Match your paint or finish
If you’re painting over a filled spot rather than repainting the whole wall, try to match the sheen level as well as the colour. Matt emulsion over a previously satin-painted wall will look different even if the colour is identical. Where possible, repaint the full wall face for a seamless result.
Check also:
Frequently Asked Questions
Can I leave a wall plug in the wall if I’m not using it?
Yes, in most cases leaving an unused plug in place causes no structural issue. If it’s flush with the surface, you can fill over it with wall filler and redecorate. The only reasons to remove it are if it’s protruding, loose, or you need the hole for something new. Filling over a flush plug is often quicker and cleaner than extracting it.
What should I do if removing a wall plug causes a large chunk of plaster to come away?
Stop and assess the damage. If it’s a surface chip, fill it with a flexible repair filler. If a larger section has come away down to the brick or block beneath, you may need a skim coat of finishing plaster over the area. For very large areas of damage, it’s worth getting a plasterer in rather than piling filler into a void.
Does the type of wall material affect how I remove wall plugs?
Yes, significantly. In soft plasterboard, the material around the plug is fragile, so gentler methods and lower force matter more. In dense brick or concrete, plugs grip more tightly but the surrounding material is also more resilient. Cavity walls and dry-lined walls add another consideration, what’s behind the surface affects whether the push-through method is viable.
Is it possible to reuse the same hole after removing a wall plug?
Often yes, but only if the hole is clean and undamaged. You’ll typically need a slightly larger plug to compensate for any slight enlargement during extraction. If the hole is ragged or the surrounding plaster is crumbling, fill it completely, let it cure fully, then redrill in the same spot, treating the filled area as fresh wall.
Need help with wall repairs or fixing installations around the house?
Enter your postcode to view our rates and availability in your area.
For questions about the services we offer visit our main site
Conclusion
Knowing how to remove wall plugs properly saves you from a surprising amount of unnecessary wall damage. Match the method to the plug type, use controlled force rather than brute strength, and don’t skip the repair step afterwards.
A few minutes assessing what you’re dealing with and picking the right tool will save you considerably more time patching up a botched attempt. Get it right the first time, fill the holes well, and you’ll finish the job with walls that look like nothing was ever there.




Leave a Reply