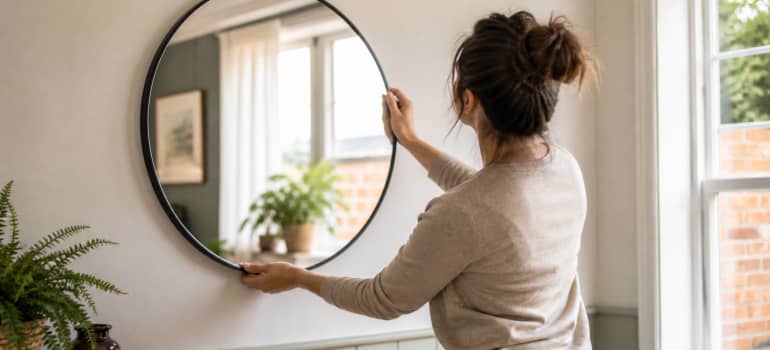
You’ve got the mirror. It’s leaning against the wall, waiting. You’ve been stepping around it for two weeks, which is basically a universal experience. The moment you decide to hang it, a quiet panic sets in: what’s behind the wall? Will it hold? Is it going in straight?
Here’s what most guides miss: knowing how to hang a mirror isn’t just about the mechanics. Where you hang it, and what it reflects, shapes how a room actually feels to live in. Get both right and a mirror can genuinely transform a space. Get either wrong and you’ll be re-drilling in a month or staring at a reflection of your radiator every morning.
TL;DR
- Use the correct fixings for your wall type, plasterboard, brick, and tile each need a different approach.
- Hang heavy mirrors with a cleat system or heavy-duty anchors for proper weight distribution.
- Aim for the mirror’s centre at 145–150 cm from the floor for comfortable eye-level viewing.
- Avoid placing mirrors where they reflect clutter, screens, or directly face a bed.
- No-drill adhesive options work well for lightweight mirrors on smooth, solid surfaces only.
Table of Contents
How to Hang a Mirror Securely
The single most important step when hanging a mirror is identifying your wall type before you touch a drill. Solid masonry, plasterboard, and tiled surfaces each need different fixings and different tools. Use the wrong approach and the mirror comes down, sometimes taking a chunk of wall with it.
Most UK homes have either solid brick or block walls, or stud partition walls with plasterboard faces. Older properties tend to be solid throughout. Newer builds and internal walls are more often plasterboard over timber or metal studs. Tap the wall. A hollow sound means plasterboard. A dull thud means solid masonry.
For solid walls, you’ll need a masonry drill bit, a decent drill, and masonry anchors with screws rated for the mirror’s weight. For anything over 5 kg, use two fixing points rather than one. More contact points means more stability, and if one fixing works loose over time, you’ve still got a backup.
For plasterboard walls, the rules change. Standard screws into plasterboard alone won’t hold a mirror safely. You need either a stud behind the plasterboard (use a stud finder to locate them) or specialist hollow wall anchors designed to grip the cavity behind the board. Heavy-duty plasterboard fixings expand as you tighten them, gripping the back face of the board. They’re reliable if you match them to the mirror’s weight.
Before you drill anything, check your mirror’s weight. Most mirrors have it printed on the box or in the product specs. If yours doesn’t, a bathroom scale works fine. Match your fixings to that weight with a sensible margin. A fixing rated for 20 kg is the right call for a 12 kg mirror, not a fixing rated for exactly 12 kg.
Tools you’ll actually need: a drill, the correct bit for your wall type, a spirit level, a pencil, a tape measure, and appropriate fixings. A stud finder is worth borrowing or buying if you’re working with plasterboard. It saves a lot of guesswork.
How to hang a mirror on a wall using the drilling method. Covers wall identification, marking, drilling, and fitting correctly for different wall types and mirror weights.
-
Identify your wall type
Tap the wall where you plan to hang the mirror. A hollow sound means plasterboard. A dull thud means solid masonry. This tells you which drill bit and fixings you need before you buy anything.
-
Choose the correct drill bit
Use a masonry bit for brick or block walls. Use a standard HSS bit if you’re hitting a timber stud behind plasterboard. Never use a wood bit on masonry or a masonry bit on timber, neither will work properly.
-
Mark your fixing points accurately
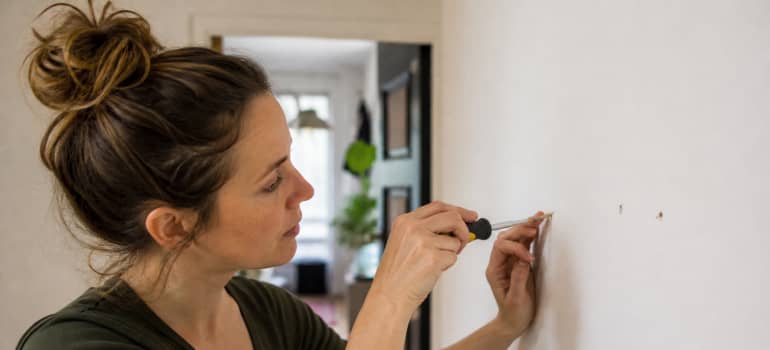
Measure the distance between the hanging points on the back of the mirror. Transfer those measurements to the wall using a tape measure and pencil. Use a spirit level to confirm both marks are perfectly horizontal. This is where most people rush and regret it.
-
Set your drill depth
Your anchor length determines how deep to drill. Wrap a small piece of tape around the drill bit at the correct depth as a visual guide so you don’t go too deep or too shallow.
-
Insert the correct anchor for your wall type
For solid masonry, use standard plastic wall plugs matched to your screw size. For plasterboard without a stud behind it, use hollow wall anchors or spring toggles. Push them in, tighten them, and they expand to grip from behind.
-
Fix the screws and hang the mirror
Leave screws slightly proud of the wall if your mirror has keyhole or D-ring hangers, you’ll need something to hook onto. If your mirror has a wire, use two screws at the same height and hook the wire across both. Check the mirror is level before letting go.
Check also:
What’s the Right Height for Hanging a Mirror?
The standard recommendation is to position the centre of the mirror at roughly 145–150 cm from the floor. That puts the reflective surface at average adult eye level, so you’re looking into it rather than at the top of your own head. It feels natural immediately, and that matters more than you’d expect.
That said, 145–150 cm is a starting point, not a rule written in stone. A few situations call for a different approach.
Hallway mirrors usually work best at standard eye level, but if you’ve got a low console table beneath one, drop the mirror slightly so it sits in visual proportion with the furniture below. The relationship between the mirror and the table matters as much as the absolute height.
Bathroom mirrors over basins are a special case. Here, the mirror needs to be centred over the basin rather than at a fixed floor height. The bottom edge typically sits well above the basin rim, but the simplest check is to stand at the basin and look forward. If you can see your full face comfortably, it’s right.
Tilting mirrors, common on wardrobes and dressing areas, can sit slightly higher because the angle compensates. Tilting a mirror forward by a few degrees shifts the effective reflection point downward, so the visual result is similar to hanging it lower.
Decorative mirrors used as art rather than for practical reflection can follow different rules entirely. A large round mirror used as a focal point above a fireplace, for example, is placed for visual impact rather than eye level. In those cases, trust your eye over the tape measure.
Check also:
Which Hanging Method Should You Use?
The right method depends on three things: the mirror’s weight, your wall type, and whether you want something permanent. Here’s how each approach actually works and where each one falls short.
Drilling
This is the most reliable option for anything heavier than a very small decorative piece. Done correctly, it’ll stay put for years. The step-by-step process is covered in the section above.
No-Drill Solutions
No-drill options have genuinely improved. They’re not a compromise in every situation, but they do have real limits worth knowing before you commit.
- Self-adhesive mirror hanging strips work well for lightweight mirrors on smooth, clean, non-porous surfaces. They bond to painted plaster, smooth tiles, and glass reasonably well. They do not bond reliably to textured walls, old painted surfaces that might peel, or damp areas. Always clean the surface with isopropyl alcohol before applying and wait the full curing time before loading them.
- Adhesive hooks follow the same rules. Check the stated weight limit carefully and stay well within it. A hook rated for 3 kg holding a 2.8 kg mirror is an accident waiting to happen. Aim for a hook rated for at least double the mirror’s actual weight.
- The honest trade-off. No-drill solutions are genuinely useful for renters or anyone who doesn’t want to make holes. But they’re not suitable for mirrors above 5–6 kg, textured or uneven walls, or anywhere with moisture or temperature fluctuation, such as kitchens or poorly ventilated bathrooms. If your mirror is heavy, drill it.
French Cleat System
For very heavy or oversized mirrors, a French cleat system is worth knowing about. It involves two interlocking angled wooden strips: one fixed to the wall, one to the back of the mirror. When you hang the mirror, the strips lock together and distribute the weight across a wide area rather than concentrating it at one or two points. It’s the approach joiners and professional picture hangers use when weight is a real concern. More setup effort upfront, but extremely solid once in place. Fix the wall cleat into studs or solid masonry rather than plasterboard alone for anything genuinely heavy.
Reflective Aesthetics: What Your Mirror Actually Points At
Once the mirror is secure, the conversation shifts. A mirror on a wall doesn’t just sit there. It actively participates in how a room looks and feels, and it’s worth being deliberate about where you point it.
The most useful thing a mirror can do in a smaller UK home is borrow light. Position a mirror on a wall that faces or sits adjacent to a window and it bounces natural light back into the room. This genuinely makes a space feel larger and brighter, not in an aspirational magazine way, but in a measurable, day-to-day way. A north-facing room benefits enormously from this. It’s one of the simplest things you can do to improve a space that doesn’t get much direct sun.
But mirrors reflect everything, not just the good stuff. A mirror positioned to face a cluttered corner, a pile of laundry, or a stack of boxes doubles that clutter visually. The room looks twice as messy. Similarly, a mirror reflecting a television screen creates a secondary glare point in the evening that’s genuinely distracting. Check what’s actually in the reflection before you commit to a spot.
In bedrooms, some people find a mirror directly facing the bed disruptive to sleep. Whether that’s psychological or practical (light from a phone or movement catching in the reflection at night), it’s real enough to be worth thinking about. Angling the mirror slightly or positioning it on a side wall avoids the issue entirely.
In hallways, position the mirror where you’ll naturally pause as you leave the house, not just where the wall happens to be blank. A picture and mirror hanging service covers everything from choosing the right fixing to deciding where a piece will actually work in the room, useful if you’ve got a large or heavy mirror and want both the placement and the installation handled properly.
Frequently Asked Questions
Can you hang a heavy mirror without drilling?
Technically yes, but the options are limited. Adhesive solutions only work safely on smooth, clean, solid surfaces and for mid-weight mirrors. For anything genuinely heavy, the risk of adhesive failure is too high. If drilling is completely off the table, a French cleat fixed properly into the wall is a far safer route than relying on adhesive strips alone.
What’s the strongest way to hang a heavy mirror?
A French cleat system is the most stable option. It spreads the load across a wide section of wall rather than concentrating it at one or two points. The interlocking angled strips also make levelling easier and let you slide the mirror sideways to fine-tune its position. For very large pieces, fix the wall cleat into studs or masonry rather than plasterboard alone.
What fixing should I use for plasterboard?
First, check whether there’s a timber or metal stud behind the plasterboard at your chosen fixing point. A stud finder makes this straightforward. If there’s a stud, screw directly into it. If not, use hollow wall anchors designed for plasterboard cavities. Always check the stated weight rating and choose anchors rated for at least one and a half times the mirror’s actual weight.
How do I hang a mirror on tiles without cracking them?
Drilling into tiles is possible but carries a real risk of cracking, especially with older tiles or larger formats. Use a diamond-tipped tile drill bit at low speed with no hammer action, applying gentle, steady pressure. Start with a small pilot hole. Alternatively, strong adhesive mirror pads rated for tiles work well for lighter mirrors and avoid drilling entirely.
How far apart should fixing points be for a wide mirror?
For wide mirrors, aim to space your fixing points at roughly two-thirds of the mirror’s total width. This gives a stable base without placing the fixings so close to the edges that the mirror feels unbalanced. Always measure from the hanging hardware on the back of the mirror, not from the frame edges.
Get your mirror hung safely today
Enter your postcode to view our rates and availability in your area.
For questions about the services we offer visit our main site
Conclusion
Hanging a mirror well comes down to two things working together: the right fixing for your wall, and a deliberate choice about what the mirror actually does in the room. A perfectly drilled mirror pointing at a cluttered corner hasn’t really achieved much.
Take the extra few minutes to check what the mirror will reflect before you mark the wall. Match your fixings to your wall type and your mirror’s actual weight. Do both and you’ll end up with a mirror that earns its place.




Leave a Reply