Some people don’t care if they can change the brightness of their lights, but if you do, you’ve come to the right place.
Here, at Fantastic Handyman we will explain how to install a dimmer switch in the place of your regular switch, so you can take the comfort of your home to the next level.
Table of Contents
What is a Dimmer Switch?
A dimmer switch is just like any other standard light switch, only it gives you the opportunity to adjust the brightness of your lighting body. Dimmer switches need a specific installation and come in different shapes and sizes.
Types of Dimmer Switches
There are many different types of dimmers and categories can be mixed and customized to every person’s needs.
- Single-pole dimmers – for only one room.
- Three-way dimmers – for two or three rooms.
- Multi-location dimmers – for brightness control of more than four rooms.
Depending on the light bulbs they use, dimmers can be:
- Fluorescent dimmer bulbs;
- Halogen bulbs;
- Incandescent bulbs;
- Magnetic low-frequency bulbs;
- Electronic low-frequency bulbs;
- LED bulbs.
Note that not all dimmers can work well with each bulb, so find an electrician near you for further questions. Depending on the control styles, dimmers can be:
- Rotary dimmers, where you simply rotate a knot in order to adjust the brightness of the bulb.
- Toggle dimmers, where you switch up and down a few levels, however, know that in these models, the level of brightness is fixed and you can only choose from a few set brightness levels.
- Slide dimmers are the same as rotary dimmers, only in a straight line.
- Tap dimmers, where you have a touchpad to tap on with a finger in order to adjust the brightness.
Check also:
Can You Change a Light Fitting Yourself, or Do You Need an Electrician?
How to Install a Dimmer Switch
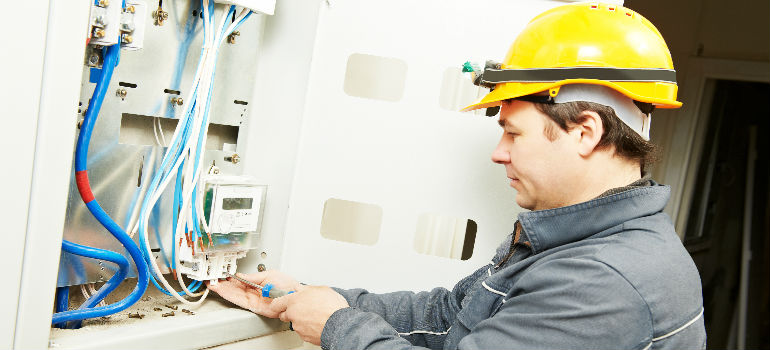
Once you’ve chosen the switch you like best, it’s time to install it. Remember, all electrical work is recommended to be done by a certified electrician. The general steps in replacing a light switch with a dimmer are the following:
- Cut off the electricity supply. Never start an electrical project with a still active electrical current in the room you’re working in.
- Remove the old switch. Unscrew the wall plate and gently pull the switch away. You should see a bundle of white wires. Use a voltage tester, to ensure power isn’t reaching the circuit (even if you cut off the electricity, better safe than sorry). Look for a wire labeled “common” and note it. Disconnect all wires.
- Connect the new dimmer switch. For single-pole dimmers, you have to connect all ground wires from your dimmer to a green or bare copper wire in the wall box. Twist the ends together and cap them with a wire connector nut. Tighten a wire nut over each pair of wire ends. For a three-way switch only connect the black dimmer wire to the wire tagged “common” and remove the electrical tape. Connect the rest.
- Replace the wall plate. Slowly push the wires back into the electrical box. Tighten the screws holding the dimmer to the electrical box. If you are installing a dimmer that has a removable knob, then remove it from the dimmer by gently pulling outward before attaching the wall plate. If the dimmer has a separate wall plate, tighten the mounting screws that hold the wall plate to the switch.
- Switch on the electricity and test the dimmer.
Contact a reliable elecrician online.
Enter your postcode to view our rates and availability in your area.
For questions about the services we offer visit our main site
How to Replace a Dimmer Switch with a Standard Switch
And, of course, if you’re sick of having to think of another thing, such as the brightness in your room, you can always go back to standard on/off switch. Here is how:
- Turn off the power. No matter what electrical work you do, the electricity supply has to be off.
- Remove the screws from the switch panel. Use a common screwdriver.
- Use a voltage tester on the wires. Despite turning off the electricity, it’s important to test for residual electricity. It can give you a shock out of nowhere.
- Remove the dimmer switch from the box. Pull the dimmer switch out of the wall, and remove the wire splice connectors using a common screwdriver.
- Attach the new standard switch. Wrap the ground wire around the green screw at the bottom of the standard switch. Wrap one of the black wires around one of the brass screws at the side of the standard switch. Attach the other black wire to the other brass screw on the standard switch.
- Push the new switch into the switch box. Carefully secure the whole bundle inside the wall and screw the panel back.
- Turn on the power and test the new switch.
Read also:
Can You Actually Dim Led Lights?
Annual inspections of your electricity supply are a must if you’re a home-owner. But, if you happen to forget these things, you can always rely on Fantastic Handyman’s home maintenance checklist to remind you. If you’re enhancing your home’s ambience with new lighting, you might also consider upgrading your entertainment setup.
A professionally mounted TV can complement your new dimmer switch perfectly, creating a cosy and modern living space. Our team at Fantastic Handyman offers expert TV mounting services blinds fitting and curtain hanging service along with a wide range of home maintenance services.
Image Source: WitchitS / Shutterstock.com