
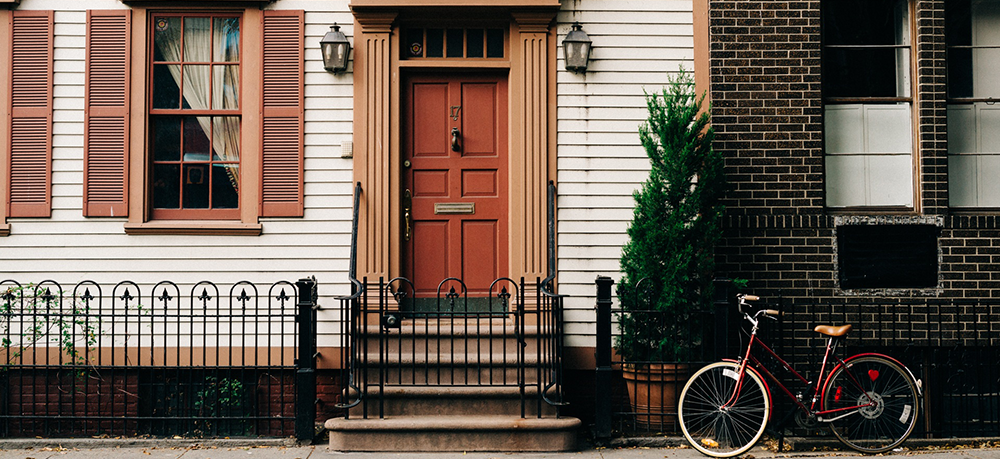
Not every wall needs wood paneling, but we have to admit, the best way to bring character to your interior is by wood paneling.
Adding wood panels to your walls is a lot of work, not to mention it requires a lot of skill and knowledge of the process and materials. Thankfully, the Fantastic Handyman team has described the basics in this short guide.
Table of Contents
Types of Wood Paneling
The types of wood paneling depend on your general taste. Some people prefer it one way, other would like another, but in the end, it would be a good idea to consult with a designer about the specific room.
- Board and batten. The most traditional style of wall paneling, mostly used on exteriors. It consists of a wide board followed by a smaller more narrow batten, creating a stronger structure.
- Vertical paneling. Vertical paneling is exactly as you hear it. It consists of wooden panels aligned vertically on the wall through its entire height. The panels are usually painted and polished until they shine.
- Horizontal paneling. Everything we’ve said about the vertical paneling here is the same, except rotated horizontally.
- Wainscot paneling. Wainscot is a design that panels only a part of the wall, but not up to its full height. The boards usually finish with a border called a “cap”, which comes in different designs.
- V-groove paneling. This is a type of vertical paneling, where the edges of the boards have been shaved so that when it butts up to another board it forms a “V” shape in the groove.
- Bed board paneling. This one consists of strips of wood with small beads in between each board. Usually comes at the height of a bed (hence bed board), but it’s also used for bathrooms with bathtubs.
- Abstract paneling. The most modern type you can find, abstract paneling usually comes in box patterns and it’s not for people with more traditional taste. Still, it can bring a lot of character to a room.
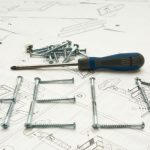
Tools you Need
It’s preferable to leave the installation of wall paneling to a professional, but if you insist to do it on your own, here are the tools you need:
- Wooden panels by choice;
- Wood glue;
- Wall trim molding;
- Finish nails;
- Nail gun;
- Paint and brushes;
- Miter saw;
- Pencil;
- Level;
- Measuring tape.
Check also:
Painting and Decorating Know-How: The Novice Guide to Paint like a Pro
How to Add Wood Paneling to Walls
There are a few most important steps to take when installing wood panels. The best advice we can give you is to take your time with the measurements.
- Decide on height. The height of the wood panels is all up to you. You can choose any of the types we listed above. It’s important to take into account the other items in the room and see which one will be better accent. Another good reason to have a designer close by.
- Measure the walls. Once you know where the paneling is going, measure the wall and cut the excess wood with a saw. This step will be best executed if you calculated the length of the panels before ordering them. It’s best to calculate about 10% more than you need, just in case. It’s better to have wastage than having all your panels be just not long enough.
- Think of pipes and electrics. Wall paneling has another secret use of hiding exposed plumbing from view. You can choose your design accordingly. Also, take note of all the sockets and switches are on the wall and fit the appropriate panels.
- Check the condition of the wall. Needless to say, an uneven and unattractive wall would need to have wooden battens installed, so the panels have something straight and sturdy to get fixed on. Also check for damp, blown plaster, or any flaking on the surface, or if there is a leaky pipe inside the wall. This problem better be dealt with first.
- Fix your panels. Depending on the design you have chosen, there are a few ways to install the panels. The most popular one is with wood glue. Apply the glue and use pins to hold the panels in place while they dry. Once dry, you can remove the pins, but you’ll need to sand them later in order to ensure a flawless finish.
- Paint the paneling. The wood paneling has been fitted and with holes and gaps have been filled. Before painting, make sure the surface is well cleaned and there is no dust. Paint with a soft brush, the more details there are on the panels, the smaller brush you need. After it dries, add a second coat.
Need a Handyman?
Enter your postcode to view our rates and availability in your area.
For questions about the services we offer visit our main site
How to Maintain Wood Panel Walls
Now that you have beautiful wood paneled walls, it’s a good idea to know how to maintain their appearance, so they stay like this for a long time.
- Clean with a dry cloth. The best choice for this is a microfiber or linen cloth. Wipe the wood panels from dust at first in order to remove any free particles.
- Clean with a cloth dampened with lemon oil. Dilute no more than a few drops of lemon essential oil in water and dampen a soft cloth with the solution. Wring the excess water as much as you can and wipe the wood panels. This is only to be used for stubborn dirt you can get rid of when using only a dry cloth.
- Use the dusting attachment on the hoover. Another way to remove dust and grime from the walls is by using the dusting attachment of the hoover you have at home.
Wood paneling a wall can be the most brilliant idea you’ve ever had in your home interior. Or, it may turn into a disaster if you don’t know what you’re doing. This is why the Fantastic Handyman team is here to help with your endeavour.
Picture source: Galyna Motizova / shutterstock.com

An informative read, thanks for the tips!
Great article! This is one helpful tips. Thanks for sharing types of Wood Paneling we can choose from and the steps how to add them.