If the walls in your living room are coloured in the incredibly dull hues of white or beige, then you have a problem that affects millions of people worldwide. But before you grab the nearest brush and give it your best shot, ask yourself this – do you really know what you’re doing?
If your answer is anywhere between “No” and “Maybe”, then we strongly encourage you to check out our detailed list of painting and decorating tips. Who knows, when you’re done reading this, you might actually enjoy the whole process as much as you would enjoy the final result!
Table of Contents
Foreword: There’s More to Painting Than You May Think!
It’s tempting to approach a painting job as if it is child’s play. Unfortunately this is not the case, otherwise, the countless professional painters and decorators across the globe would not be there in the first place, would they? Truth is, there are one too many things that can go awry with your interior redecoration, especially if hastily put together.
This goes double if you lack the right tools, equipment, and experience to professionally strip and repaint your home’s walls or ceiling. If you cannot set aside the required time and effort, then scheduling a professional house painting service and hiring a skilled painter would be the sensible choice. If, on the other hand, you believe that you can handle this task on your own, then simply keep on reading.
The Pre-painting Stage: Prepare by Clearing Up in 6 Easy Steps
- Set aside a prep day.Let’s begin by stating the obvious – you cannot do everything all at once, so arm yourself with a bit of patience and devote an entire day or so to various painting preparation tasks before moving on to the project itself.
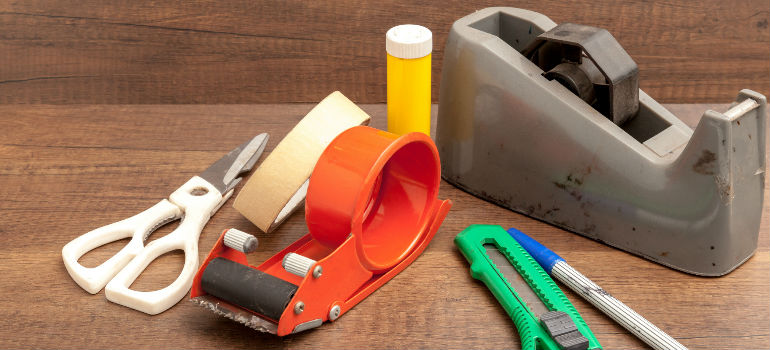
- Free up some space. All those wall shelves, paintings, drawers, wardrobes, and lamps will only slow you down. If you cannot move everything into an adjacent room, then consider placing your furnishings in the middle of the room and hiding them under a generous amount of drop cloth. Don’t forget to also tape the cloth in place and add an extra cover on top to protect your belongings from splashes.
- Remove all hardware. If you’ve never before painted around doorknobs or cabinet hinges in your life, there’s no reason to torture yourself now. To protect your furniture from accidental drips, get some zipper storage bags and place all cabinet and door knobs, hinges, light switch plates and switches inside. To avoid confusion, make sure to label each individual bag so that you know where all bits and pieces should go (living room door, etc.) after you’re done repainting your walls.
- Fix before you paint.If your wall surfaces have seen better days, make sure to patch them up before applying the first coat of paint. Spackle, for instance, is a great tool when it comes to fixing small holes and cracks. You can also use fibreglass to mask larger gaps, as well as various texturising products to perfectly match the appearance of your existing wall finish.
- Dress the part. Unfortunately, wearing your finest business suit will not yield better performance. In fact, you’ll end up spending a fortune trying to remove the paint splatters at your nearest dry cleaner. To save yourself tons of hassle, we suggest taking off all your jewelry and dressing in old, but comfortably loose clothing. Such clothes include a pair of slip-on shoes and an old baseball hat (especially useful when painting ceilings). Don’t forget to wear some form of eye protection, too.
- Assemble your workstation. An organised workspace can make wonders for your project. Ensure that everything is within a hand’s reach by establishing your workstation right in the middle of the area that you’re about to paint. So, grab your buckets of paint, brushes, rollers, hammers, screwdrivers, plastic bags, paint can openers, drop cloths and whatever else you need and gather them in a neat pile.
We can help with the painting!
Enter your postcode to view our rates and availability in your area.
For questions about the services we offer visit our main site
The Painting Stage: 11 Tips & Tricks to Better Your Painting
Your room is free from obstacles, you wear proper clothing, and your tools of the trade are lying conveniently nearby. Now what? Here are a few tips and tricks that professionals use all the time in order to achieve that immaculate finish you’ve seen on Internet ads and TV commercials.
Eliminate lap marks by maintaining a “wet edge”
There’s nothing more annoying than painting walls for several hours straight only to end up with mismatching layers of buildup paint. This usually happens if you roll over a painted section of your wall that has already dried up. One of the wall painting techniques that you can use to correct that is called “wet edging”. This method will help you overlap the previous stroke before it has the chance to dry out and ruin your painstaking efforts. And here is how it works.
Grab your roller and start at the corner of your wall, then run the roller up and down until you reach the top. Make sure to move slightly to the side while rolling and always paint in backward motions in case you need to even out a paint buildup or a streak. Keep the roller half-loaded at all times and ensure that the open side of the roller’s frame is facing the wall segment that you’ve already painted. This will lessen the pressure on the roller, resulting in fewer paint ridges.
Mix paints together for a uniform colour
When people give you advice on what type of paint to use on walls, they will often skip the most important bit. Which is that every can of paint usually comes in slightly different shades of the same colour. Instead of finding out about this after the fact, you can easily solve the problem by pouring all cans together in a 5-gallon bucket – a mix & match process known as “boxing”.
If you cannot estimate the exact amount that you would need for your project, you can never go wrong by adding more on top as you’ll be able to easily pour the leftovers back into the cans. If your project is more ambitious and includes kitchen painting and that of several other rooms, we suggest getting a roller screen as it will load your roller much faster than any standard tray.
Check also:
Pros and Cons of Painting the Ceiling the Same Colour As the Walls
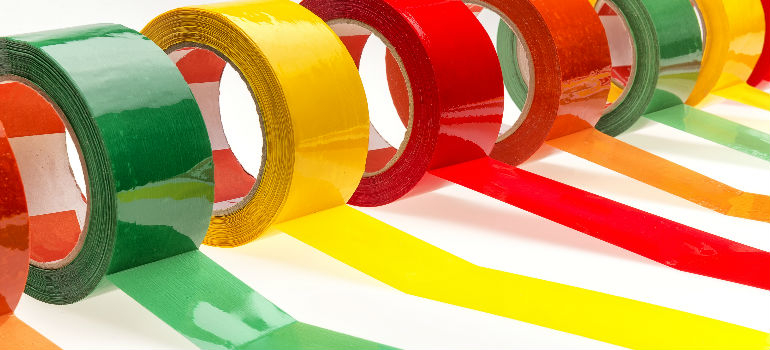
Cut the masking tape loose
Hold on – don’t make the rookie mistake of pulling the masking tape way before the paint has dried out. This process can remove whole chunks of dried paint and you’ll have to repaint the affected area. Instead, wait for at least 24 for the paint to fully dry out, then cut the masking tape loose with a sharp knife before removing it from the wall. When cutting, make sure to pull up the tape at a 45-degree angle and start from an inconspicuous spot to check if the paint has dried.
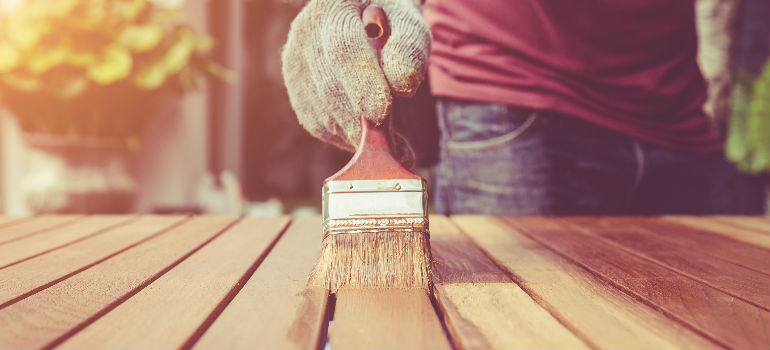
Paint the edges first
If you want to learn how to paint a room like the pros, they always start by painting the edges, corners, and the areas under your windows and around your door frames first before working on your walls. Doing so will allow you to tape off just these areas instead of the entire wall surface.
Giving these finicky places in your home a fresh appearance is easy. To do so, begin from the top of your wall and gradually work your way down. Also, don’t dip more than a quarter of your brush into the can as the excess paint will spill all over your fingers and cause a sticky mess.
Blotchy finish? Not if you prime your wall
You might think that your wall paint is uniform, but get closer and you’re likely to spot a few bright spots here and there. This blotchy phenomenon is known as “flashing” and is generally caused by holes and cracks that were previously fixed with either a filler or a drywall compound. Their smooth and dull surface will often stand out in stark contrast to the rest of the wall and bug you every time you pass nearby. And God forbid if some of your visitors notice these as well.
But don’t get disheartened just yet, because all of this can be fixed with one quick coat of primer. Before doing anything, however, you should choose the right nap thickness for your roller in order to match the texture of the surrounding paint. For instance, we recommend using a 1/2″ nap for textured walls and a 3/8″ for smooth finishes. Once the primer is applied, it will seal the patch, prevent the paint from sinking in, and bring back its original sheen. Problem solved.
Clean before you paint to achieve best results
Many guides with tips on painting and decorating skip this bit, but it’s just as important. While it’s tempting to simply hide all dirt and dust underneath a fresh coat of paint, it will likely peel off soon after. To ensure that your paint will be there to stay, grab a pair of rubber gloves, don some eye protection, and either use a deglosser or some heavy-duty cleaning product. Apply your chosen solution to a lint-free cloth and use circular motions to clean the soiled surface. Once all greasy hand marks and stains are gone, your walls will practically paint themselves.
Ensure an even texture by rolling paint along the edges
You can immediately tell if the painting work has been done by a professional by simply looking at the corners and the areas next to the trim. Why? Because these are usually painted with just the brush, which gives them a different texture and makes them immediately pop out.
To avoid this common mistake, make sure to evenly spread the paint out with a roller before it dries out. Try to roll as close to the edge as possible without touching the opposite wall or dripping paint on the trim. Proceed to the next area once the paint has been evenly applied.
Cotton drop cloths offer the best bang for your buck
Like wind or rain, the appearance of paint spills and splatters is simply just a matter of time. But that doesn’t mean that you cannot prepare for their flamboyant appearance. Getting a canvas of drop cloths is quite cheap and it serves as an ideal covering for practically any surface. The paint will also dry out faster, so you won’t track any of the spilled paint around your house.
Just keep in mind that canvas can get very slippery when placed on a hard flooring. This, however, can be easily fixed by purchasing some sheets of rosin paper. Foolproof the area by taping the sheets together and then to the floor itself to create a solid base for the cloth canvas. When a spill happens, make sure to blot it as soon as possible with either towels or cloth rags.
Feather out paint in hard-to-reach areas
Unfortunately, tall walls or stairwells are going to prove problematic if you try to paint them with continuous strokes. However, you can prevent most of the lap marks by feathering out the paint in areas where you cannot maintain a wet edge due to physical constraints.
To avoid paint build-ups, roll a nearly dry roller in varied directions along the edge, while at the same time feathering (thinning) the paint out. Move to the next section only once you’ve covered the whole length of your wall or ceiling with this thin coat of paint. Then, paint over the feathered spots by applying more of the coloured substance in the opposite direction.
Sand the trim in between coats
When it comes to wall trims, usually a single coat of paint isn’t enough to hide the trim’s original colour. On the other hand, adding two coats in a row without sanding the surface will result in an unpleasant, grainy texture. To achieve a smooth finish, grab a fine-grit sanding sponge and sand the surface before and after you apply the first coat (for the latter, wait for at least 24 hours first). Vacuum the trim after each sanding and thoroughly wipe it down to remove leftover dust.
Don’t skimp on quality
This is perhaps one of the most valuable interior painting tips on this list. Patience and good technique can only get you so far – if you don’t have the proper tools (paints, brushes, rollers) to go along with them, you will end up with disappointing results at best. So, the next time you drop by your local hardware store, try to tame your urge to purchase the cheapest brushes available.Some of the drawbacks of getting dirt-cheap supplies to include brush bristles all over your painted wall or brushes that refuse to hold a decent amount of paint, forcing you to work twice as hard to achieve a reasonably good finish. In other words, just don’t do it. You have been warned.
Check also:
Protect Your Walls: The Comprehensive Guide to Anti-Mould Paint
The Post-painting Stage: Add the Finishing Touches
Now that you’ve painted your room just the way you wanted, it’s time to do a bit of touch-up and cleaning work. But where should you even begin? We’ve got you fully covered – just read the tips below and you’ll shape your drying walls and/or ceiling into a work of art in no time.
- Store some paint for touch-ups. Get a small jar or a metal storage container to store a bit of paint when you need to mask some scratches or dents. When you pour the paint, make sure to note where the substance was last used (hallway walls, kitchen cabinets, etc.). While you’re at it, write down its type as well, for instance, whether it’s latex, satin, gloss, or eggshell. When you need to make small repairs, simply give the container a good shake and use a Q-tip or a foam brush to mask the imperfections.
- Get yourself a few razor blades. With these sharp implements in hand, scraping off excess paint from windows, tiles, or glass surfaces becomes a walk in the park. The drips won’t get smeared all over the surface, too. Just try not to scratch the surface.
- Keep a few rags for cleaning around. You are doomed without at least a few pieces of cloth by your side. Use those to wipe off excess paint, catch drips, soak up spills, and regularly wipe your hands to prevent accidental spots on your otherwise spotless wall.
Need help with the painting project?
Enter your postcode to view our rates and availability in your area.
For questions about the services we offer visit our main site
Extra Hacks & Techniques: 16 Painting and Decorating Tricks
You still here? Good, for you’re about to add 16 clever decorating tips & tricks to your painting arsenal! We’ve asked the skilled painters and decorators at Fantastic Handyman what painting hacks they’ve ended up using on a regular basis and here’s what we have to share:
- Avoid cleaning your brush or roller during every break and wrap them in plastic wrap. Seal them in a plastic bag and they’ll be good to go.
- Paint fumes can be easily absorbed by slicing some onions and placing them nearby.
- Attach a container lid to your brush – this little modification will catch all paint drops.
- Wipe down any metal surfaces with vinegar to keep the paint from peeling.
- Place the treated items in a box to keep things nice and neat (If you use spray paint).
- Unstuck messy brushes by soaking them in hot vinegar for about 30 minutes.
- Rub a candle over wooden surfaces to achieve an antique-like aesthetic.
- Avoid painting screws and keyholes by covering them with a dash of petroleum jelly.
- Vanilla extract is great for negating the permeating smell of heavy paint fumes – just add a tablespoon to your bucket of paint and see for yourself!
- Cover your door hinges with some masking tape to leave their original colours intact.
- A lint roller is all you need to take the fuzz off your paint roller and get down to work.
- Don’t have a paint brush holder? Just use an empty plastic bottle instead.
- Cover your toilet tank with a garbage bag for an easier bathroom painting job.
- Need to have your brushes ready for action on the very next day without actually having to clean them? Just put them in the fridge!
- Refresh old masking tape by putting it in a microwave for no longer than 10 seconds.
- Aluminium foil is your best friend when you’re trying to protect objects that are in your way (taps, pipes, etc.) from getting covered in artistic paint splashes.
Image Source: POM POM/shutterstock.com


Fantastic article! I’m a painter and decorator in London, and I can’t count how many times I’ve been called to fix a dodgy paint job, usually because the client hasn’t cleaned or primed their wall to save time!
If there’s one thing I’ve learnt, it’s that you can’t rush painting. Take your time, do the necessary prep work and, most importantly, layer and have patience afterwards!
If my customers followed this article, I’d be out of work! Thanks for the read.
Thanks for writing such a good tips on interior painting. I will try your tips for my home soon. Meanwhile can you please let me know how can we use carved wooden furniture for interior decoration. Please write a post on this topic.
All the mentioned steps through this blog are fantastic for both pre paint and post paint conditions . i would like to thank you for sharing this great information.
Thanks for nice post.
Thank you very much!
Great article. Well, I am Graham C Fisher from Winchester I am a professional painter and decorator so this article is really informative for me as well as for the people who don’t know about painting. Thanks for sharing.
Thank you, Graham. Indeed, one can always learn something new even when he’s an experienced professional.
Who don’t want to save money, I am one of them. I am looking for some tips about painting and how can I save money. After google it the topic I find your post and it’s really so helpful for me. I will follow this tips for my home painting.
There’s some great information in this article and its impossible to cover everything. Preparation is one of the real secrets to a quality job. This is an easy to follow post for professionals and amateurs alike
Brilliant little guide top man
Thanks for the great info. I love reading article that help my business grow, and your insight was amazing!
Thank you for this interesting article. I’m reading your blog long time and a lot of very usefull infromation. When you will post new article? Can’t wait 🙂 Thanks
Hello!
We’re always glad to see positive comments from colleagues in the branch. Stay tuned for new posts soon! In the meantime, you can check the latest articles published this year
Thanks for explaining that the edges of the windows and doors should be painted first because it will make it easier to tape the areas and paint the rest of the room faster. My neighbor wants to get his interior walls repainted because the rooms are being renovated. He is not much of a handyman, so maybe calling in expert will be the best option for him.
Hello,
Awesome Blog.
Such this post is very informative.
Thanks for sharing with us.
Hello,
We have a painting & decorating company and are constantly reading up on how we can improve and thats how we found this article.
The clear detail in each and every step was so impressive and really made it a fantastic read!
One of the first things we got taught was to paint around the edges first so it was nice to see that in the piece too.
An excellent post, thank you
The facts that have been discussed here are really important. Thank you so much for sharing a great post.
Hello I want to first congratulate and thank the materials contained on the site, they are mainly relevant for us who are from the same sector
Great article with great tips for DIY jobs. Love the tricks at the end 🙂
Great article with great tips and ideas. We are always open to learn new tricks of the trade. Thank you for sharing your tips, will definitely be following your blog from now on.
Your blog is super helpful it gives so much ideas and information.
These are some great idea about interior painting guide tips tricks know how to paint like a professional step by step daily that you have discussed here. I really loved it and thank you very much for sharing this with us. You have a great visualization and you have really presented this content in a really good manner.
Great blog thank you for sharing. DIY paint jobs can be very rewarding once done.
Great information, Thanks for sharing this informative blog with us. Keep sharing!!
Great blog!
Thanks for sharing this amazing post…
We’ run a plastering company and came across this article. And oh my gosh, it is the most informative I’ve seen, Obviously, after we’ve done the plastering, a lot of our clients then paint the walls themselves, to varying degrees of success. I’ll be steering them towards this article next time! Thanks so much.
Thank you so much for sharing this to us. These are all noted. Details are very helpful!
Very good friend for sharing this wonderful content. Keep posting, amazing work!! We appreciate your insight and tips! I wish my husband can be a good painter and do the paint shopping with me for my house next month after reading some tips here for home innovation! You deserve a big clap! Thomy ~
That was some cool tips. I had a plan of painting my bedroom wall something different. Definitely gonna try out some these.
Thanks so much for sharing this content its really helpful. I have recently started my decorating business and i’m keen to learn as much as I can.
This is a great site to have for us painters. Some great ideas on here and comments.
I want to congratulate your excellent work.
A house painting and decorating is one of the tasks that I want to do, I often searched on the internet for some good advice and design that I can make on the next project that I can do. Thanks for sharing these tips and guides to painting like a PRO.
Informative post! Wow! I didn’t know how important this is! I accidentally visited this site while looking for something else!, But Wow!, Good thing I came into this site.
Hello,
I really appreciate your work. I liked your work.
I can’t wait for your next blog.
Thanks.
I just read your blog post on the pre-painting stage. I think it’s great! The tips are really helpful and made me rethink my approach to painting prep work.
This guide is incredibly detailed and helpful for anyone looking to tackle interior painting projects like a pro! I appreciate how you’ve broken down the process step-by-step, making it easy for beginners to follow along. The tips on prepping the surface and choosing the right tools are especially valuable—they really set the foundation for a great result. Thank you for sharing such practical advice and tricks to achieve a professional finish. This is a fantastic resource for DIY enthusiasts!