You’re staring up at that old, flickering light in your hallway. It’s been buzzing for how long now? To add to the drab atmosphere, the old fitting gives your space a stuck-in-the-past vibe.
Even if you wanted to improve the look of the room, you likely can’t because this old fitting can’t handle modern LED bulbs. At this point, the question pops into your head – can you change a light fitting yourself?
On the one hand, it seems simple. Just remove the old fitting, attach the new, and voilà. On the other hand, this is electricity we’re talking about. All it takes is one mistake.
This guide will walk you through everything you need to know. When it’s safe and whether you should attempt to change a light fixture yourself. Also, when it’s smarter to call in a professional electrician.
Read along!
Table of Contents
Do you need an electrician to change a light fitting?
If it’s a like-for-like replacement and the wiring is already there, you’re good. It’s generally easy and legal to do it yourself.
However, work in bathrooms, kitchens, outdoors, or with old or unclear wiring, is best left to a professional. These areas often have stricter safety requirements, and mistakes can cost you dearly. Be honest about your DIY skills. Avoid electrical work if you’re unsure, as mistakes can cause blown circuits, damage, or electric shocks.
Light fittings specifics
So, what is a light fitting? It’s the fixture that holds your light bulb and connects it to your home’s electrical system. It’s the combination of socket, wiring, and often decorative casing that brings light to a room.
In UK homes, light fittings aren’t one-size-fits-all. They come in several common types, each with its own quirks in installation.
Ceiling lights are the most familiar. These sit flush against the ceiling and usually consist of a simple rose or plate that houses the wiring. You can easily replace one of these if it’s of modern design. On the other hand, older ceiling roses or outdated wiring can be trickier.
Wall lights, or sconces, are often used in hallways or bedrooms. They tend to have shorter wiring runs and are slightly simpler to install.
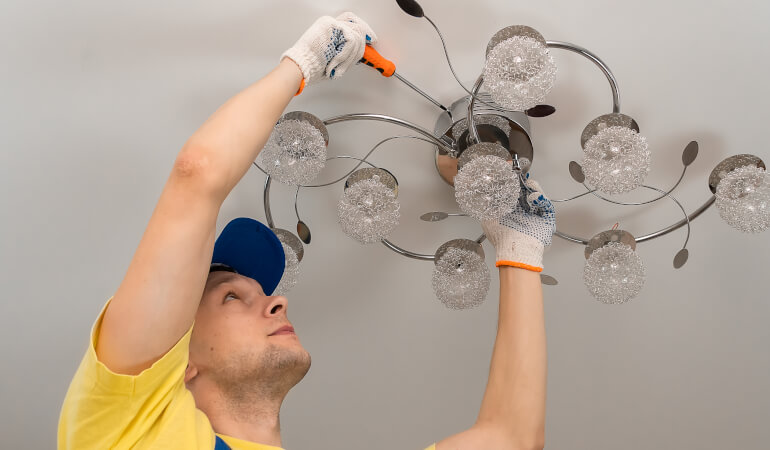
Chandeliers can be beautiful centrepieces. They’re heavier and often have multiple bulbs. This makes them harder to install, especially if the ceiling box needs to support extra weight.
Pendant lights, or hanging lights, drop down from the ceiling and can vary in length and design. While many modern pendants are designed for easy installation, some older or intricate designs require extra attention and experience.
Check also:
Can You Actually Dim LED Lights?
Steps to change a light fitting
Changing a light fixture isn’t complicated in theory, but the small details matter for safety. Take your time and don’t rush.
Equip yourself with the proper tools:
- Screwdrivers (flathead & Phillips). For removing the old fitting and securing the new one.
- Wire cutters/strippers – If you need to adjust wires.
- Voltage tester – For confirming that the power is off.
- Ladder or step stool – You need it for stable and safe access to the ceiling.
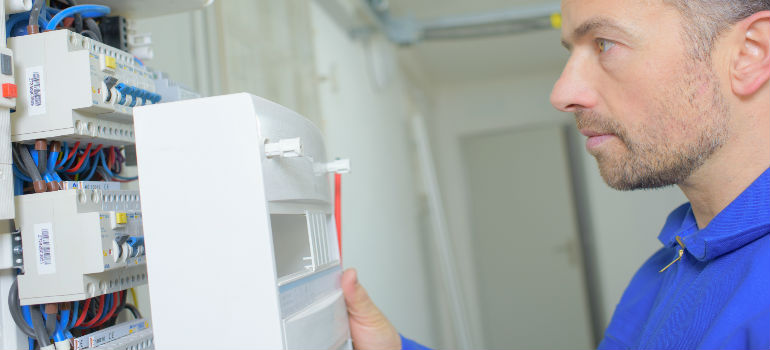
Step 1: Turn off the power
Head to your consumer unit (fuse box) and switch off the circuit for the light fitting. If you’re unsure which one it is, switch off the main power supply.
Once that’s done, go back to the light switch and turn it on. Nothing should happen. Then use your voltage tester on the wires to confirm there’s no current running through them. Never skip this step.
After that, quickly confirm you’ve isolated the correct circuit. It sounds obvious, but mistakes here are common and dangerous.
Step 2: Remove the old fitting
Carefully unscrew or unclip the existing light fitting from the ceiling or wall. You might need to support it with one hand while you loosen the screws with the other.
As you expose the wiring, take a moment to note how everything is connected. Or better yet, take a quick photo with your phone for later.
Gently loosen the terminal screws and disconnect the wires. Don’t pull. Instead, ease them out carefully.
Step 3: Inspect the wiring
Take a good look. Check for frayed insulation, burn marks, loose copper strands, or anything that doesn’t look right. If the wiring seems brittle or damaged, this is where a DIY job should stop.
Also, check that the new fitting is compatible with the existing setup. Voltage and wattage should match. The wiring layout should be similar. If the old fitting has live, neutral, and earth wires, then so should the new one.
Also, there must be enough space in the ceiling for the wires to sit safely without being cramped. If it doesn’t line up neatly, don’t force it.
Step 4: Attach the new fitting
This is where you’ll replace the old light fixture with the new one. Connect the wires from the fitting to the corresponding wires in your ceiling. Match the live, neutral, and earth wires.
Secure the wires into the terminal block. Each connection should feel tight and no bare wire should be exposed. Loose connections are a common cause of faults and, in worst cases, overheating.
Once everything is wired up, fix the new fitting to the ceiling or wall with the provided screws or bracket. It needs to sit flush and feel secure when you touch it.
Step 5: Test the fitting
Turn the power back on at the consumer unit. Head back to the switch and test your new light. If it comes on cleanly, with no flickering or buzzing, you’re good to go.
If it doesn’t work, switch the power off again before you touch anything. Double-check your wiring connections and make sure everything is seated properly.
If you’re still stuck, that’s your cue to call in an electrician rather than guess your way through it.
Check also:
How to Install a Dimmer Switch
Safety tips to consider when replacing a light fitting
There are some actions you can take to make the replacement of your light fitting, if not a success, then at least not a disaster.
- Electric shock risks – The most obvious danger is a shock. Turn off the power at the consumer unit and check with a voltage tester to ensure the circuit is dead before touching any wiring.
- Overloading circuits – Not all light fittings are created equal. Check that the new fitting is compatible with the circuit’s rating. Your bulb wattage must match what the fitting and circuit can handle.
- Check for existing problems – Old or damaged wiring is a hidden hazard. Look for frayed cables, scorch marks, or loose connections before you start. If anything looks dodgy, stop. It’s far better to call in a professional than risk making the problem worse.
- Use of proper tools – Insulated screwdrivers and pliers are your best friends when working with electrical fittings. They give you an extra layer of protection against accidental contact with live wires.
- The importance of the earth connection – Many fittings come with a green-and-yellow earth wire that protects you. Connect it to the earth terminal on the new fitting. Skipping it isn’t just dangerous – it’s illegal in the UK for certain installations.
Check also:
How to Install Landscape Path Lighting
When it’s best to call a specialist
There are plenty of situations where it’s far safer and smarter to hire an electrician for a light fitting.
If the wiring is old or complicated, if you’re installing a high-wattage chandelier, or if the fitting is in a bathroom, kitchen, or outdoor area, these are all scenarios where professional skills are worth every penny. Even if the task seems “simple,” hidden faults like frayed wires, improper insulation, or unusual wiring layouts can turn a DIY job into a serious hazard.
So, how much is it to change a light fitting? Hiring a qualified electrician in the UK to swap a standard light fitting costs £50-£100 on average. Complex installations cost £150 or more.
And how long does it take an electrician to change a light fitting? For a straightforward replacement, changing a light fitting takes 30 minutes to an hour. More complex jobs take 1 to 2 hours or more, especially if unexpected issues arise.
Can a handyman change a light fitting? Yes, a handyman can change a light fitting, but only in simple situations. Basic swaps are often within their skill set, however, they’re not always qualified to handle more complex electrical work or anything that falls under stricter UK regulations. Examples include work in bathrooms or major wiring changes.
Professional electricians bring expertise you can’t replace with a tutorial. They know building regulations, can spot hidden faults and carry out an installation according to the best practices. If something goes wrong later, a certified electrician’s work comes with peace of mind – and often insurance coverage for mistakes.
Are you an electrician? No? Then book one today!
Enter your postcode to view our rates and availability in your area.
For questions about the services we offer visit our main site
Takeaways
- You can usually change a light fitting yourself if it’s a simple like-for-like swap with modern, safe wiring.
- Bathrooms, kitchens, outdoor lights, and old wiring are cases where you should not attempt DIY electrical work, so call a professional.
- Always switch off the power at the consumer unit and use a voltage tester before touching any wires.
- Different fittings (ceiling lights, chandeliers, pendants) vary in difficulty, with heavier or older designs being more complex.
- Small mistakes in wiring can lead to serious risks like electric shocks, blown circuits, or fire hazards.


Leave a Reply