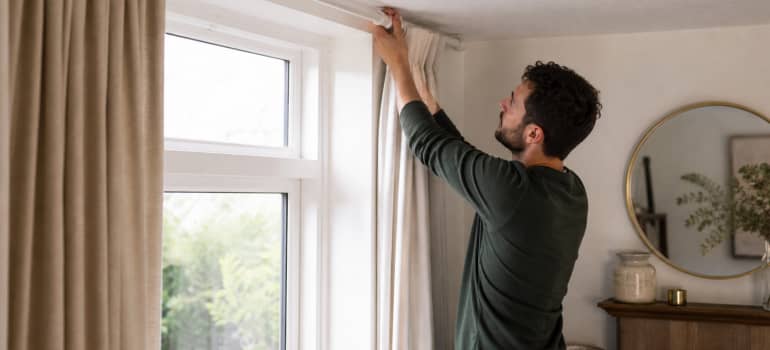
You’ve just moved into a rented flat, and the windows are staring back at you, bare, cold, and about as welcoming as a dentist’s waiting room. You want curtains up. You need curtains up. But the landlord’s already made it clear: no drilling into the walls. Sound familiar? Knowing how to put up a curtain pole without drilling isn’t just a niche skill for renters. It’s genuinely useful for anyone dealing with tiled walls, listed buildings, stone surfaces, or just a deep reluctance to fill holes in a freshly decorated room.
The good news is that no-drill methods have come a long way. Some are genuinely solid, and choosing the right one makes all the difference. This guide walks you through your real options, how each one works, and what to watch out for so you don’t end up with curtains on the floor by Tuesday morning.
TL;DR
- No-drill curtain poles are ideal for renters, delicate walls, and temporary setups.
- Tension rods, adhesive rods, Command hooks, and stick-on holders are the main options.
- Curtain weight and wall type are the two most important factors when choosing a method.
- Tension rods work inside window recesses and need no surface contact at all.
- Adhesive systems need a clean, smooth, non-porous surface to hold reliably.
- No-drill solutions have weight limits, heavy lined curtains may need a different approach.
- Proper surface prep dramatically improves how long adhesive solutions last.
Table of Contents
Can You Put Up a Curtain Pole Without Drilling?
Yes, you can hang a curtain pole without drilling. Tension rods, adhesive rod brackets, Command hooks, and stick-on rod holders are all proven methods that work without making a single hole in the wall. The key is matching the right method to your wall type, window shape, and curtain weight, get that right and you’ll have curtains that stay up reliably.
That said, no-drill solutions do have limits. Very heavy curtains, wide windows without a recess, and porous or uneven wall surfaces can all cause problems. The methods below cover the full range of situations, including which ones to avoid and why.
Overview of No-Drill Curtain Pole Methods
There are four main approaches worth knowing about. Each one works differently, suits different situations, and comes with its own trade-offs. Here’s a clear breakdown before you commit to anything.
Tension Rods
Tension rods work by pressing outward against two opposing surfaces. You twist the rod to extend it until it grips the walls on either side of a window recess. No glue, no hooks, no contact with the wall surface in the traditional sense. They’re adjustable within a certain range, easy to remove, and genuinely reusable.
They’re best suited to window recesses where there are two solid surfaces to push against. If your windows sit flush with the wall rather than inside a recess, a tension rod won’t work the way you need it to. They’re also load-sensitive, push past the weight limit and the rod drops. Lightweight curtains, sheers, and voiles are their sweet spot.
Adhesive Rods
Adhesive curtain rods use industrial-strength sticky pads to mount brackets directly onto the wall surface. You press the bracket on, wait for the adhesive to cure, then slot the rod in. The surface needs to be smooth, clean, and non-porous for the bond to hold. Paint, tiles, and glass can work well. Rough plaster, brick, or wallpaper, not so much.
The weight limits matter here. Most adhesive systems are rated for lighter curtain panels. Always check the product’s stated load capacity before you buy, and be honest about what you’re hanging.
Command Hooks
Command hooks use a specific type of stretch-release adhesive strip. The hooks go on the wall, and you thread or loop a lightweight curtain rod through the curtain and rest it on the hooks. Removal is clean when done correctly, you pull the tab straight down slowly, and the strip releases without leaving a mark.
These are genuinely great for lightweight curtains in low-humidity rooms. Bathrooms and kitchens are riskier because moisture can weaken the adhesive bond over time. They’re not designed for heavy fabric either, the hooks will eventually pull away if you overload them.
Stick-On Rod Holders
Stick-on rod holders are purpose-built brackets with an adhesive backing. They look more like conventional curtain brackets than hooks do, which makes the finished result look neater. You stick them to the wall, wait for the adhesive to set, then slot the rod into place. Some designs use a rotating clip to lock the rod in, which helps prevent the rod from rolling out if the curtain catches on something.
Like adhesive rods, surface prep is everything here. They work well on painted plasterboard or smooth-rendered walls. Textured or porous surfaces are a different story.
Check also:
How Do You Choose the Right No-Drill Method?
The right no-drill curtain solution depends on three things: your wall surface, the weight of your curtains, and whether you have a window recess. Match those three correctly and you’ll make a decision you won’t regret by week two.
Use this checklist to narrow down your options quickly:
- Do you have a window recess? If yes, a tension rod is your simplest option. No surface contact, no mess.
- Is your wall surface smooth and non-porous? If yes, adhesive rods or stick-on holders will work. If the surface is rough, textured, or wallpapered, avoid adhesive solutions.
- Are you hanging lightweight curtains or sheers? All four methods can handle this. Command hooks are particularly good here.
- Are you hanging medium-weight lined curtains? Tension rods or adhesive rod holders with a higher weight rating are your best bet. Avoid basic hooks.
- Are you hanging heavy blackout or thermal curtains? Be honest: no-drill solutions struggle here. You may need to reconsider, or at minimum, use multiple adhesive brackets spread across the pole to distribute the load.
- Do you need to remove the rod regularly? Tension rods win. Adhesive solutions aren’t designed for repeated removal and reapplication.
- Is appearance important? Stick-on rod holders look closest to conventional brackets. Tension rods are often hidden inside the recess anyway.
Detailed Steps for Installing Tension Rods
Tension rods are the most forgiving of the no-drill options, but getting the length and tension right makes the difference between a rod that stays up and one that pings off at 2am. Here’s how to do it properly.
How to install a tension rod curtain pole without drilling, step by step.
-
Measure your window recess
Use a tape measure to get the exact width of your window recess at the point where you want the rod to sit. Measure at the top, middle, and bottom, recesses aren’t always perfectly even. Use the smallest measurement so the rod fits without forcing it.
-
Choose the right rod length
Pick a tension rod whose adjustable range comfortably covers your measurement. Aim for a rod that, when extended to fit, sits roughly in the middle of its adjustment range rather than pushed to its limit. Rods at maximum extension lose some grip strength.
-
Thread your curtain onto the rod before fitting
Slide your curtain panels onto the rod now, before you install it. Trying to add curtains after the rod is under tension is frustrating and risks dislodging it. Make sure the curtain runs smoothly along the rod’s full length.
-
Extend the rod and position it
Hold the rod horizontally inside the recess at your chosen height. Twist the outer section to extend the rod until it makes firm contact with both walls. You’re looking for solid resistance, not so tight that you’re forcing it, but firm enough that it doesn’t shift when you push it gently sideways.
-
Check the level and adjust
Step back and check the rod looks level visually. If it’s drooping on one side, the tension may be uneven. Adjust by slightly rotating the rod while in position to add more grip on the lower side. A small spirit level placed on top of the rod confirms it accurately.
-
Test the hold before loading the curtains
Before letting the curtain’s full weight sit on the rod, give it a gentle downward tug in the centre. It should hold firm. If it slips, remove it, increase the tension slightly by extending it a few more millimetres, and refit. Only once you’re satisfied with the hold should you arrange the curtain properly.
Why Are No-Drill Curtain Solutions So Popular Now?
More people are renting, living in older properties with fragile walls, or simply want window dressings they can change without leaving a trace. No-drill curtain solutions have grown because they offer a practical way to hang curtains without committing to permanent fixings, ideal wherever drilling is restricted, risky, or just plain inconvenient.
Rental properties are the obvious driver. Most tenancy agreements either forbid drilling outright or require you to make good any damage when you leave. Even if drilling is technically allowed, the cost of replastering or repainting can eat into your deposit fast.
But it’s not just renters. Period properties and listed buildings often have original plasterwork that crumbles the moment a drill bit touches it. Tiled walls in kitchens and bathrooms are notoriously awkward to drill without cracking. Even in a modern home, there are windows where the wall depth, the position of hidden pipes, or the sheer effort of finding a stud makes a no-drill solution genuinely appealing.
The key shift is that modern no-drill products are actually good now. Early versions were flimsy and felt like a compromise. Today’s options are purpose-built, and when you match the right method to the right situation, they hold up well.
Advantages and Limitations of No-Drill Options
No method is perfect. Before you commit, it’s worth seeing them laid out honestly side by side so you know exactly what you’re getting into.
| Method | Key Advantages | Key Limitations |
|---|---|---|
| Tension Rods | No surface contact, fully adjustable, reusable, easy removal | Requires a recess, lower weight capacity, can slip over time |
| Adhesive Rods | Works outside recesses, looks tidy, variety of finishes | Surface must be smooth and clean, not reusable, curing time required |
| Command Hooks | Clean removal, widely available, good for lightweight curtains | Weight limits are strict, not suitable for humid rooms long-term |
| Stick-On Rod Holders | Closest look to conventional brackets, secure rod lock on some models | Surface dependent, adhesive failure risk on porous or textured walls |
The biggest recurring theme is weight. All no-drill solutions have a ceiling when it comes to how much they can hold, and heavier lined or blackout curtains can push past that ceiling quickly. If you’re hanging something substantial, be realistic. Spreading the load across more brackets helps, but it’s not a complete solution for very heavy fabric.
The other honest limitation is longevity. Tension rods can lose grip gradually, especially if they’re knocked repeatedly. Adhesive solutions are often a one-time deal, remove and reapply them a few times, and the bond weakens. Plan for that upfront rather than discovering it six months in.
Check also:
Real-World Considerations and Tips
A clean installation on paper doesn’t always translate perfectly to real walls. Here’s what actually trips people up, and how to get around it.
Uneven Walls
Older properties in particular have walls that aren’t quite plumb or flat. Adhesive brackets need full surface contact to bond properly, and even a slight curve or bump can create gaps in the adhesive pad that weaken the hold. If your wall has texture or isn’t totally flat, use self-adhesive brackets with a larger surface area rather than small point-contact ones. More contact means more holding power.
Surface Prep for Adhesive Solutions
This is where most adhesive failures start. People stick the bracket onto a dusty or slightly greasy wall, then wonder why it falls off three days later. Clean the surface with a diluted alcohol solution and let it dry completely before applying anything. Even newly painted walls need to be fully cured, fresh paint can still be slightly soft underneath, which undermines the bond. If the wall was painted recently, give it at least two weeks before applying adhesive brackets.
Getting the Height Right Without a Drill
With drilled brackets, you can mark, adjust, and re-drill a centimetre higher without much drama. With adhesive solutions, you ideally only want to position them once. Use painter’s tape to mock up the bracket positions on the wall before you commit. Hold the rod in place at the height you want, mark lightly with a pencil, then double-check with a level. Only once you’re happy should you peel and press.
Maximising Curtain Coverage
One thing that often gets overlooked: tension rods inside a recess limit how wide your curtain can stack back when open. The curtain can only pull to the edge of the recess, which blocks some natural light. If that matters to you, consider stick-on holders positioned just outside the recess instead, so the rod extends slightly beyond the window frame. The curtain then clears the window fully when drawn back.
If fitting curtains feels like one job too many on top of everything else that needs doing around the house, a professional curtain fitting service takes care of measuring, positioning, and installation as part of what they do every day, useful to know when the to-do list is getting longer than your weekends.
Check also:
Frequently Asked Questions
Can I use no-drill curtain solutions on tiled walls?
Yes, tiles are actually one of the better surfaces for adhesive solutions because they’re smooth, non-porous, and easy to clean thoroughly before application. The main risk is applying too much pressure when sticking the bracket, which could crack older or thinner tiles. Press firmly but steadily rather than pushing hard. Grout lines are a problem though, if your bracket sits across a grout line, the adhesive won’t bond evenly and the hold will be weaker.
How do I remove adhesive rod holders without damaging my wall?
Most adhesive rod holders are designed to be removed by warming the adhesive gently with a hairdryer on a low setting, then peeling the bracket away slowly at a shallow angle rather than pulling it straight off. Any residue left behind usually comes away with a small amount of adhesive remover applied carefully with a cloth. Test any remover on an inconspicuous area first, especially on painted surfaces.
Will a tension rod work on a very wide window?
Tension rods have practical limits on span. The wider the recess, the more the rod will sag in the middle under curtain weight. Most standard tension rods are designed for narrower windows. For wide windows, look for tension rods with a centre support mechanism, or use two rods side by side with curtain panels split in the middle. A single rod spanning a very wide opening without central support will bow noticeably.
Are no-drill methods suitable for bay windows?
Bay windows are tricky for any curtain system, but no-drill methods add an extra layer of complexity. Tension rods only work if there’s a recess at each segment of the bay. Adhesive brackets can work on the flat wall sections between angles, but the angled corners are awkward for standard brackets. Flexible track systems that bend around the bay exist, but most require some form of fixing. This is one case where the no-drill approach may genuinely not be the right tool for the job.
How long does it take for adhesive curtain brackets to reach full strength?
Most adhesive systems reach a working hold within a few hours but don’t hit full rated strength for 24–72 hours depending on the product and the ambient temperature. Fitting in a cold room slows curing significantly. Avoid loading the brackets with curtain weight within the first 24 hours wherever possible. Rushing this stage is the single most common reason adhesive brackets fail early.
Get your curtains fitted without the hassle
Enter your postcode to view our rates and availability in your area.
For questions about the services we offer visit our main site
Conclusion
Knowing how to put up a curtain pole without drilling gives you real options, whether you’re renting, protecting period walls, or simply want a cleaner result. The method you choose matters more than most people realise, tension rods, adhesive systems, and hook-based solutions each suit different windows, surfaces, and curtain weights. Match the solution to the situation rather than defaulting to whatever’s cheapest or quickest.
The biggest mistakes are overloading the system and skipping surface prep. Get those two things right, and a no-drill installation can last just as long as you need it to, with none of the wall damage to deal with when you move on.




Leave a Reply